Driving Tutorial: Difference between revisions
No edit summary |
(English language clarification) |
||
| Line 1: | Line 1: | ||
{{Warning|Don't edit this page without permission, only for correcting the English words and layout.}} | {{Warning|Don't edit this page without permission, only for correcting the English words and layout.}} | ||
Now that you have finished the [[Starting Tutorial]], it's now time to drive a train. How do you drive a train? Here you will find out. | |||
== Placing a train (Explore only) == | == Placing a train (Explore only) == | ||
In explore mode you need to place your train before you can use it. | In explore mode, you need to place your train before you can use it. To place a train, go to the left side of the screen with your mouse. Click on the train icon. Now you will see a screen with all the trains available in this beta version. Select the train of your choice and the amount of the trains by pressing the add button. After that, select the station were you want to place your train. When done, press OK and the train will be loaded at the selected station. <br/> | ||
[[File:Warning Icon.png|20px]] The beta does not yet check if the track is free | [[File:Warning Icon.png|20px]] '''The beta does not yet check if the track is free; be careful not to place 2 trains at the same start point.''' [[File:Warning Icon.png|20px]] | ||
careful not to place 2 trains at the same start point. [[File:Warning Icon.png|20px]] | |||
[[File:Add icon.png]] opens [[File:Add.png|350px]] | [[File:Add icon.png]] opens [[File:Add.png|350px]] <!-- This is an older file not showing the new organisation system. --> | ||
== Select your train and get in == | == Select your train and get in == | ||
Before you can start your train you first need to select it. You can select your train in the [[consist bar]] in the bottom of the screen. | Before you can start your train you first need to select it. You can select your train in the [[consist bar]] in the bottom of the screen. | ||
On the left side of the consist bar you can scroll to all the trains loaded | On the left side of the consist bar you can scroll to all the trains loaded at that time. Click on the cab to get in the train. | ||
[[File:Consist bar.png]] | [[File:Consist bar.png]] | ||
== Starting the train == | == Starting the train == | ||
Before you can drive the train, you have to start it. To start the train press {{Key|1=Ctrl|2=F4}}. Now you will be able to drive the train. If you are at a station with overhead wire, you need to put the pantograph up with {{Key|1=Ctrl|2=P}}, now the train has power to drive. This last step is only for tracks with overhead wire. | |||
== Standard driving == | == Standard driving == | ||
Beside the [[ATB]] (read that page for information about the ATB) you can drive now. To drive forward first be sure the train is in PZ throttle ([[MG2]],[[SG2]] and [[RSG2]]) or in Rij throttle ([[RSG3]] and [[SG3]]). You can change that with the {{Key|Q}}, and {{Key|W}}, keys. Then you can press the {{Key|>}}, | Beside the [[ATB]] (read that page for information about the ATB) you can drive now. To drive forward first be sure the train is in PZ throttle ([[MG2]],[[SG2]] and [[RSG2]]) or in Rij throttle ([[RSG3]] and [[SG3]]). You can change that with the {{Key|Q}}, and {{Key|W}}, keys. Then you can press the {{Key|>}}, to accelerate or the {{Key|<}}, for the brakes. You can see your speed and the maximum speed in the cab. Braking has a maximum of 4.00 for the [[MG2]],[[SG2]] and [[RSG2]] and a maximum of 0.75 for the [[RSG3]] and [[SG3]] to keep the passengers comfortable. For throttle there is no maximum, but the [[RSG3]] and [[SG3]] can accelerate fast so hold the throttle on 0.75 for the most comfortable ride. | ||
== Using the emergency brakes == | == Using the emergency brakes == | ||
| Line 27: | Line 26: | ||
==== [[SG2]] and [[RSG2]] ==== | ==== [[SG2]] and [[RSG2]] ==== | ||
The '''SG2''' and '''RSG2''' can brake with a maximum of -8.00 but | The '''SG2''' and '''RSG2''' can brake with a maximum of -8.00, but even though it brakes extremely fast, it isn't an emergency brake. For that you have to activate the track brakes. The track brakes are automatically on when the pantograph is up, but on the third rail you have to activate them with the emergency button ( {{Key|1=Ctrl|2=L}}). Once you hear a high pitched noise, use the {{Key|/}}. key to activate the emergency brake. | ||
==== [[MG2/1]], [[SG2/1]], [[RSG3]] and [[SG3]] ==== | ==== [[MG2/1]], [[SG2/1]], [[RSG3]] and [[SG3]] ==== | ||
The '''MG2/1''', '''SG2/1''', '''RSG3''' and '''SG3''' all have the same system for their emergency brakes. To activate the emergency brakes | The '''MG2/1''', '''SG2/1''', '''RSG3''' and '''SG3''' all have the same system for their emergency brakes. To activate the emergency brakes, set the brakes of the train to -2.00. You can activate the emergency brakes by pressing the {{Key|/}}. key. | ||
== Stop at a station == | == Stop at a station == | ||
When on duty you always have to stop | When on duty, you always have to stop at every station so reaching your maximum [[ATB]] speed is not necessary and sometimes unreachable. Before reaching the platform slow down until a your speed is between 40 and 50 km/h; otherwise, you cannot brake hard enough to stop at the platform. Also try to stop the train next to the numbered sign which contains the number of carriages you have. The blue signs are for [[MG2]], [[SG2]], [[RSG2]], [[MG2/1]] and [[SG2/1]] carriages while the white signs are for [[RSG3]] and [[SG3]] carriages. When stopped at the platform, you can choose to unlock or open the doors. Be sure to open them on the proper side. After some time (8 seconds for small stations and 12 for the bigger stations) you can close the doors and leave the station. | ||
<gallery> | <gallery> | ||
File:Bakbord blauw.png|Blue number sign | File:Bakbord blauw.png|Blue number sign | ||
| Line 40: | Line 39: | ||
</gallery> | </gallery> | ||
== Passing a station == | == Passing a station == | ||
When off duty you have to pass some stations without stopping. Keep in mind to slow down before passing a station. | When off duty, you have to pass some stations without stopping. Keep in mind to slow down before passing a station. | ||
== Decouple/Couple == | == Decouple/Couple == | ||
<!-- some information here may be helpful --> | |||
== Using the pantograph == | == Using the pantograph == | ||
For some lines, trains receive power from an overhead wire. Before the train can receive the electricity from the overhead wire, you have to rise the pantograph with {{Key|1=Ctrl|2=P}}. If you drive from the overhead wire to the third rail you have to press {{Key|1=Shift|2=P}}. to lower the pantograph. You have to raise and lower the pantograph between the signs below: | |||
<gallery> | <gallery> | ||
File:Panto Up allowed.png|Allowed to rise pantograph | File:Panto Up allowed.png|Allowed to rise pantograph | ||
| Line 54: | Line 54: | ||
== Pass a level crossing == | == Pass a level crossing == | ||
In the simulator there are two kinds of level crossings, for the differences see [[AHOB]]. Passing them is easy but some things | In the simulator there are two kinds of level crossings, for the differences see [[AHOB]]. Passing them is easy, but there are some things to remember. The AHOB, as used on the RET metro parts, uses [[ATS]] lights which give you permission to pass: blue means don't pass and yellow means you can pass safely. The ATS light will turn yellow when the barriers are unlocked to go down. When a crossing is placed behind a station you have to activate the crossing with the activator loop, drive slowly over the loop, and wait until the yellow ATS light turns on. | ||
The Randstadrail uses other AHOB barriers, they work with the [[CVL]] paths. When a path is created over a crossing the crossing will close. | The Randstadrail uses other AHOB barriers, they work with the [[CVL]] paths. When a path is created over a crossing, the crossing will close. However, when you are at a station, the crossing won't close and the [[ZUB]] sign will stay red. To pass, press {{Key|TAB}}. Now the crossing will close and the ZUB sign will turn green, and you can pass safely. | ||
<gallery> | <gallery> | ||
File:ATS blauw.png|Blue ATS sign (Forbidden to pass) | File:ATS blauw.png|Blue ATS sign (Forbidden to pass) | ||
Revision as of 16:26, 17 August 2019
| Don't edit this page without permission, only for correcting the English words and layout. |
Now that you have finished the Starting Tutorial, it's now time to drive a train. How do you drive a train? Here you will find out.
Placing a train (Explore only)
In explore mode, you need to place your train before you can use it. To place a train, go to the left side of the screen with your mouse. Click on the train icon. Now you will see a screen with all the trains available in this beta version. Select the train of your choice and the amount of the trains by pressing the add button. After that, select the station were you want to place your train. When done, press OK and the train will be loaded at the selected station.
![]() The beta does not yet check if the track is free; be careful not to place 2 trains at the same start point.
The beta does not yet check if the track is free; be careful not to place 2 trains at the same start point. ![]()
![]() opens
opens 
Select your train and get in
Before you can start your train you first need to select it. You can select your train in the consist bar in the bottom of the screen. On the left side of the consist bar you can scroll to all the trains loaded at that time. Click on the cab to get in the train.
![]()
Starting the train
Before you can drive the train, you have to start it. To start the train press Ctrl+F4. Now you will be able to drive the train. If you are at a station with overhead wire, you need to put the pantograph up with Ctrl+P, now the train has power to drive. This last step is only for tracks with overhead wire.
Standard driving
Beside the ATB (read that page for information about the ATB) you can drive now. To drive forward first be sure the train is in PZ throttle (MG2,SG2 and RSG2) or in Rij throttle (RSG3 and SG3). You can change that with the Q, and W, keys. Then you can press the >, to accelerate or the <, for the brakes. You can see your speed and the maximum speed in the cab. Braking has a maximum of 4.00 for the MG2,SG2 and RSG2 and a maximum of 0.75 for the RSG3 and SG3 to keep the passengers comfortable. For throttle there is no maximum, but the RSG3 and SG3 can accelerate fast so hold the throttle on 0.75 for the most comfortable ride.
Using the emergency brakes
In case of an emergency the trains have an emergency brake. They can be used to stop the train in a short range but when used it causes flat wheels which make a lot of noise. The emergency brakes can be different depending on the train type:
MG2
The MG2 don't have emergency brakes, the maximum they can brake is -7.00.
SG2 and RSG2
The SG2 and RSG2 can brake with a maximum of -8.00, but even though it brakes extremely fast, it isn't an emergency brake. For that you have to activate the track brakes. The track brakes are automatically on when the pantograph is up, but on the third rail you have to activate them with the emergency button ( Ctrl+L). Once you hear a high pitched noise, use the /. key to activate the emergency brake.
MG2/1, SG2/1, RSG3 and SG3
The MG2/1, SG2/1, RSG3 and SG3 all have the same system for their emergency brakes. To activate the emergency brakes, set the brakes of the train to -2.00. You can activate the emergency brakes by pressing the /. key.
Stop at a station
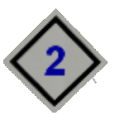
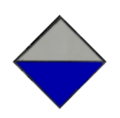
When on duty, you always have to stop at every station so reaching your maximum ATB speed is not necessary and sometimes unreachable. Before reaching the platform slow down until a your speed is between 40 and 50 km/h; otherwise, you cannot brake hard enough to stop at the platform. Also try to stop the train next to the numbered sign which contains the number of carriages you have. The blue signs are for MG2, SG2, RSG2, MG2/1 and SG2/1 carriages while the white signs are for RSG3 and SG3 carriages. When stopped at the platform, you can choose to unlock or open the doors. Be sure to open them on the proper side. After some time (8 seconds for small stations and 12 for the bigger stations) you can close the doors and leave the station.

Blue number sign
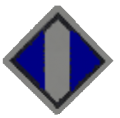
White number sign

ZUB station sign


Passing a station
When off duty, you have to pass some stations without stopping. Keep in mind to slow down before passing a station.
Decouple/Couple
Using the pantograph
For some lines, trains receive power from an overhead wire. Before the train can receive the electricity from the overhead wire, you have to rise the pantograph with Ctrl+P. If you drive from the overhead wire to the third rail you have to press Shift+P. to lower the pantograph. You have to raise and lower the pantograph between the signs below:
Allowed to rise pantograph
Rised pantograph before this sign
Allowed to lower pantograph
Lowered pantograph before this sign


Pass a level crossing
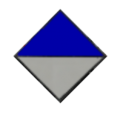
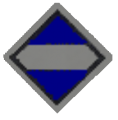
In the simulator there are two kinds of level crossings, for the differences see AHOB. Passing them is easy, but there are some things to remember. The AHOB, as used on the RET metro parts, uses ATS lights which give you permission to pass: blue means don't pass and yellow means you can pass safely. The ATS light will turn yellow when the barriers are unlocked to go down. When a crossing is placed behind a station you have to activate the crossing with the activator loop, drive slowly over the loop, and wait until the yellow ATS light turns on. The Randstadrail uses other AHOB barriers, they work with the CVL paths. When a path is created over a crossing, the crossing will close. However, when you are at a station, the crossing won't close and the ZUB sign will stay red. To pass, press TAB. Now the crossing will close and the ZUB sign will turn green, and you can pass safely.
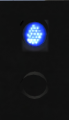
Blue ATS sign (Forbidden to pass)
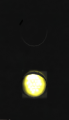
Yellow ATS sign (Allowed to pass)

The ATB activator loop


Navigation | |
|---|---|
| Getting Started | |
| Other | |