Testing Map
| Train test map |
|---|
|
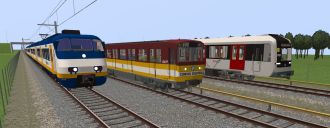
General info Screenshot  Author: Sjoerd Ydema Traction power supply: third rail / overhed wire Description: Train test map with 3 stations Download:
|
|---|
| |||||||||||||||||
This is a small map created to test out trains, without needing to wait for the simulator to load longer times when using large maps.
There are three stations, simply called station A, station B and station C. The line between stations A and B has three tracks; one for trains, one for metro's under ATB train protection, and one for metro's under ZUB train protection. The line between stations B and C is single track, only for trains. This part of the route has a banked curve intended to see if trains don't tilt in the opposite direction (which has happened in the past due to coding errors, and can be corrected when discovered by testing the train on banked track).
Destination codes for the CVL system are simply A, B and C. If you set a path manually, be aware that it is needed to set a path in and out of station B too, even though there are no switches at this station.
