Amsterdam M5
| Amsterdam M5 | ||||||
|---|---|---|---|---|---|---|
 | ||||||
| Series | ||||||
| 107-162 | ||||||
| Traction power supply | ||||||
| side rails / overhead wire (shunting) | ||||||
| Protection | ||||||
| ATB / ZUB / Coded Manual max. speed 90 km/h | ||||||
| Download |
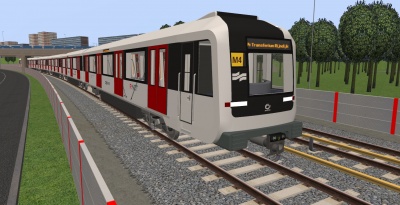
The Amsterdam M5 metro's make up a fleet of 28 six-car metro trains for the Amsterdam metro, which was supplied by the French manufacturer Alstom between 2012 and 2015. They are based on the Alstom Metropolis platform.
The following variants of this train are available:
- GVB livery
- GVB / R-NET livery
- GVB livery, testtrain configuration (1 train with full pantograph instead of shunting panograph)
- GVB / R-NET livery, A-carriage (end car with driver cabin)
- GVB / R-NET livery, B-carriage (middle car with shunting pantograph)
- GVB / R-NET livery, C-carriage (end car)
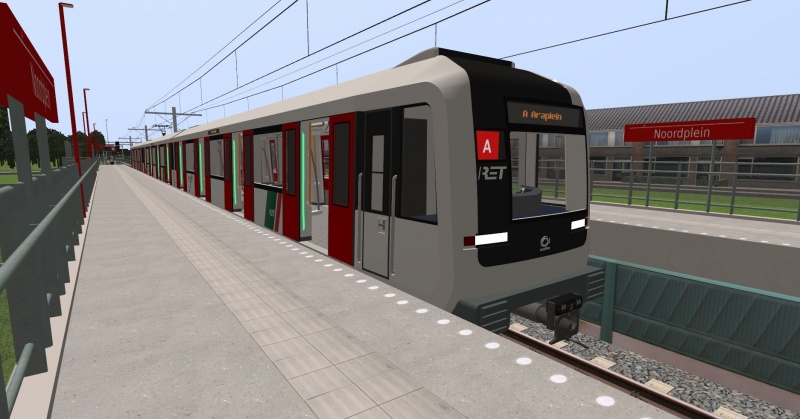
- RET / R-NET livery (fictional 3-part train with full pantograph)
With the A/B/C separate carriages, you can make any train length you want (3-car minimum). A full train consists of two three-car sets (numbered as such) coupled back-to-back; A-B-C-C-B-A. A train must be at least 3 carriages long, as the end carriages are not motorized.
The texture files for the "GVB / R-NET" and "RET / R-NET" variants can be found in the folder \Data\Amsterdam\textures. If you want to put something else on the train, add-banners
for example, you can do it here (suggestion; make a backup first).
The same goes for the line number display and the line diagrams.
The 3D model for the Amsterdam M5 was created in Sketchup by user Supertrain_fan. The model has been transfered to the simulator and animated/programmed by Sjoerd Ydema.
This train is part of the "Amsterdam" pack, which includes these trains:
- LHB M2 (Not included yet, work in progress)
- BN S1/S2 (Not included yet, work in progress)
- CAF S3/M4 (Not included yet, work in progress)
- Alstom M5
Operation in Metrosimulator
Power supply
These trains can run in service in Metrosimulator on all lines equiped with 3rd rail power supply.
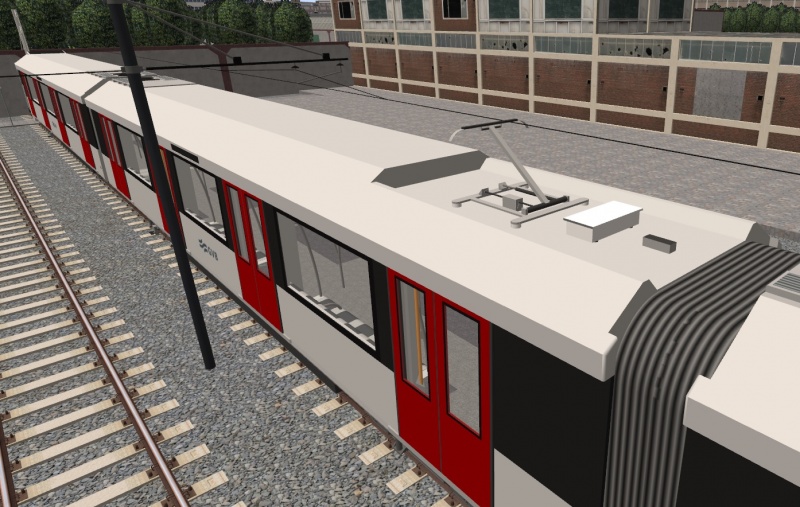
The trains have been equiped with a small shunting pantograph, which is only ment for slow speed shunting in the Diemen depot of the Amsterdam metro network. This pantograph has a maximum range of 4,7 meters above the track. As most overhead wires in Metrosimulator are at 5 meters, this isn't very usefull. However, in the network "Rijndam Metro 2022", the overhead wires at depot "Bergenseweg" (connected to track 3 at Station Westplein) have been re-installed so the M5 metro can use them.
The fictional RET version has a full service pantograph, as most lines on the Rotterdam network have overhead wire sections. So if the RET actually ordered this type of train, it would have been equiped with full pantographs to use in passsenger service. Therefore, you can use this version of the train in the simulator on all overhead wired lines too. The RET version is also just 3 carriages long; you can use it in service as single or coupled units.
Automatic Train Protection
The following automatic train protection (ATP) systems have been installed:
- RET ATB (LZB801)
- ZUB (222c)
- Coded Manual (for use on the Central Line map)
- ATP OFF (for use on the City of Thames map)
The train will automatically select the correct system when you spawn it in one of the networks. Switch-overs between ATB and ZUB will happen automatically as you transition between systems, just like on the RET SG3 trains.
(The user-operable ATP selector switch option has not been installed, as it blocks the automatic ATB-ZUB vv transitions, and the AI doesn't operate this switch.)
Train operation keys
- Shift+X _ Left driver cabin door
- Ctrl+X _ Right driver cabin door
- Ctrl+Shift+X _ Internal driver cabin door
- Ctrl+L _ Driver desk light on/off (when in tunnels)
- Shift+L _ Passenger lights on/off (when in tunnels)
- [ _ Passenger indiciator light on/off: Next platform will be on the left side.
- ] _ Passenger indiciator light on/off: Next platform will be on the right side.
- \ _ Passenger indiciator light (both sides): turn off.
- / and * (Numpad) _ Destination display
- Shift+/ and Shift+* (Numpad) _ Service number display
- Ctrl+/ and Ctrl+* (Numpad) _ Line number display (and changing route diagrams)
Light signalling
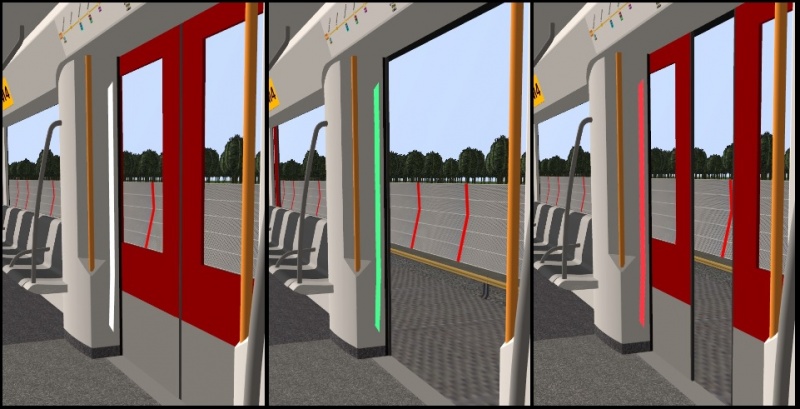
The Amsterdam M5 metro's have internal light signalling on both sides of the doors.
- White: The doors will open on this side at the next station.
- Green: You can now enter/exit at this side.
- Red: The doors are closing.
The white lights (indicating the platform side on the next station) can be operated manually with the [ and ] keys. The green and red lights operate automatically with the opening/closing of the doors.
Make sure to deactivate the white lights again (use the same key, or \ ) before you close the doors, or the light will turn white again once the doors are closed.
The indication of the next platfom side will also be shown on the center screen in the driver cabin.
Codes for activities
To use them in your own activities, you can use these codes:
  <train pack="Amsterdam" file="M5_GVB.xml"/>		Amsterdam M5, Full train, GVB.
  <train pack="Amsterdam" file="M5_Rnet.xml"/>		Amsterdam M5, Full train, R-NET.
  <train pack="Amsterdam" file="M5_withpanto.xml"/>	Amsterdam M5, Testtrain (1 train).
  <train pack="Amsterdam" file="M5_A.xml"/>		Amsterdam M5, End carriage with driver cabin.
  <train pack="Amsterdam" file="M5_B.xml"/>		Amsterdam M5, Middle car with sunting pantograph.
  <train pack="Amsterdam" file="M5_C.xml"/>		Amsterdam M5, Middle car.
<train pack="Amsterdam" file="M5_RET.xml"/> Rotterdam M5, Full train, RET (fictional).
Example of how to place a M5 train in an Simvliet activity:
 <consist start="BPD1">
   <train pack="Amsterdam" file="M5_Rnet.xml">
	<cab id="0" enabled="true" ai="364"/>
	<car id="0" scrollsign3="13" scrollsign2="64"/>
	<car id="1" scrollsign3="13"/>
	<car id="2" scrollsign3="13"/>
	<car id="3" scrollsign3="13"/>
	<car id="4" scrollsign3="13"/>
	<car id="5" scrollsign3="13" scrollsign2="64"/>
   </train>
  </consist>
And for two coupled trainsets of the RET version:
 <consist start="WES2">
   <train pack="Amsterdam" file="M5_RET.xml">
	<car id="0" scrollsign3="13" scrollsign2="61"/>
	<car id="1" scrollsign3="13"/>
	<car id="2" scrollsign3="13" scrollsign2="61"/>
   </train>
   <train pack="Amsterdam" file="M5_RET.xml">
	<car id="0" scrollsign3="13" scrollsign2="61"/>
	<car id="1" scrollsign3="13"/>
	<car id="2" scrollsign3="13" scrollsign2="61"/>
	<cab id="1" enabled="true" ai="361"/>
   </train>
  </consist>
Note: The "scrollsign3", for the line number displays / line diagrams, must be set for each carriage individually if you want the simulator to show these upon loading the activity. You can always also set them manually once the simulation has started (in which case it effects the complete train at once). In the above example, "13" results in "C".
Same goes for "scrollsign2", the service number display (numbers 01-99).
scrollsign3:
- 1: M1
- 2: M2
- 3: M3
- 4: M4
- 5: M5
- 6: M6
- 7: M7
- 8: Airport Shuttle
- 9: RET metro logo
- 10: empty
- 11: A
- 12: B
- 13: C
- 14: D
- 15: Green Line
- 16: Red Line
- 17: Yellow Line
- 18: Central Line
- 19: Out of service indicator
External links
- https://nl.wikipedia.org/wiki/Metromaterieel_M5
- https://nl.wikipedia.org/wiki/Amsterdamse_metro
- https://en.wikipedia.org/wiki/Amsterdam_Metro


